Migrating Virtual Machines
One of the key goals of the Ansible for OpenShift Virtualization Migration is to simplify and automate the process of Migrating Virtual Machines. In this section, we will illustrate how easy it is to leverage the Ansible for OpenShift Virtualization Migration to Migrate Virtual Machines that are currently running in the RHDP Workshop VMware environment into the OpenShift cluster.
First, we can use the OpenShift Web Console and the Migration Toolkit for Virtualization to view the Virtual Machines available to us. Under the Migration section of the left hand navigation bar, select Providers for virtualization. Ensure that you are in the openshift-mtv Project by selecting the dropdown from the top of the screen.
Select the vmware-target-rhdp Provider and then select the Virtual Machines tab. The list of Virtual Machines and their current state will be displayed.
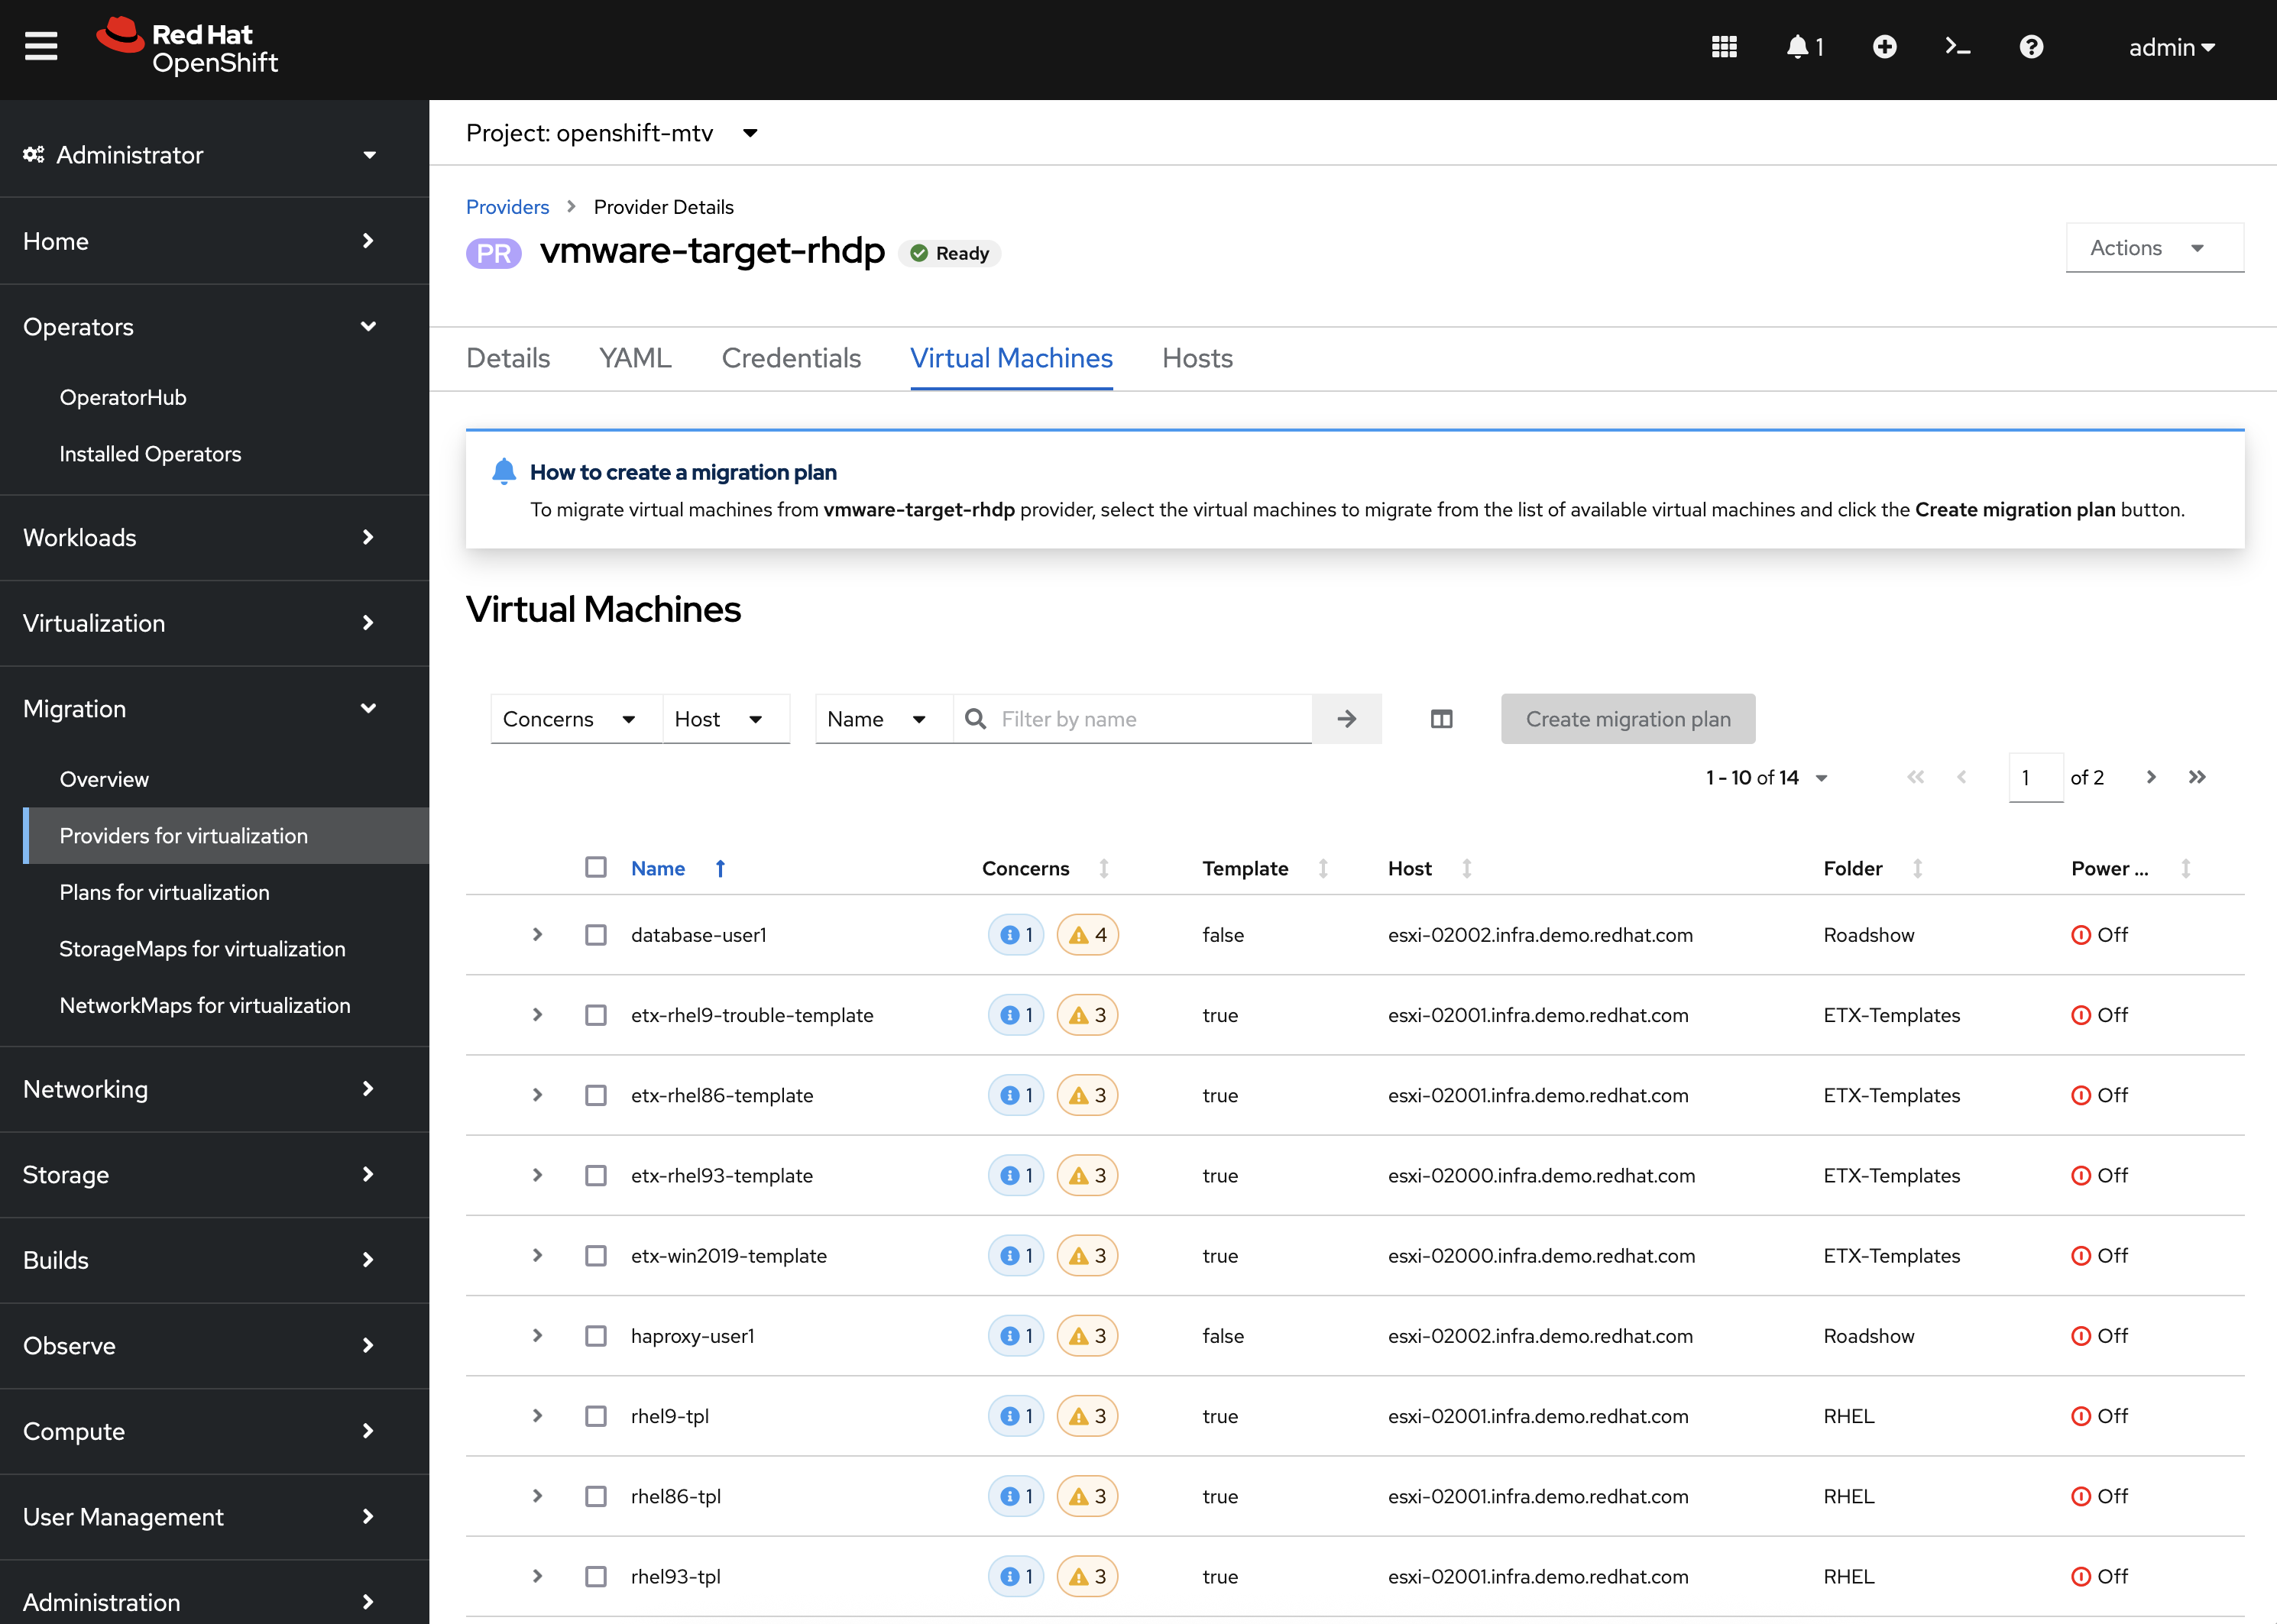
As shown, there are a number of Virtual Machines that could be migrated. Let’s demonstrate how to migrate the Virtual Machine named haproxy-user1 into OpenShift.
Configuring a Dedicated Project for Migrations
Create a Migration Project
A common use case is to create or leverage separate OpenShift Projects for where Virtual Machines are created in OpenShift. To achieve that goal, create a new Project called rhdp-migrations by selecting Projects underneath the Home section on the left hand navigation bar.
Click the Create Project button, enter rhdp-migrations in the Name textbox and click Create. With the Project created and now available for use, we can discuss the process for using it as a destination for Virtual Machine migrations.
Exploring Migration Resources
A Plan is a Migration Toolkit for Virtualization Custom Resource that describes how to migrate workloads from a Source Provider to a Destination Provider. Aside from including details related to Providers, a Plan will also specify the StorageMap and NetworkMap that should support the migration.
While we did confirm that as part of the initial setup of the Ansible for OpenShift Virtualization Migration, Providers, NetworkMaps and StorageMaps were successfully created in the openshift-mtv namespace, tenant teams typically seek to make use of these dedicated Projects (like the rhdp-migrations Project created previously) to perform Migrations. As a result, StorageMaps and NetworkMaps need to be colocated within these dedicated project (which is also where the Plans will be created). Fortunately, the Ansible for OpenShift Virtualization Migration includes automation to initialize dedicated namespaces with the required set of assets, including StorageMaps and NetworkMaps.
Configure Migration Target
Navigate to Ansible Automation Platform once again, reauthenticate if you have been logged out, and expand the Automation Execution section on the left hand navigation bar, and select Templates.
Locate and select the Configure Target - vmware-target-rhdp - rhdp.redhat.com Workflow Job Template which is use to set up a specific Migration Target against an OpenShift environment.
By default, all of the resources are created within the openshift-mtv Project. However, we can influence the configuration by setting Ansible variables which will dictate how and where the resources are created.
Click the Launch template button where you will have the opportunity to set Ansible Extra Variables. Add the following within the Variables textbox which will configure resources including the StorageMaps and NetworkMaps the rhdp-migrations namespace:
mtv_management_migration_namespace: rhdp-migrations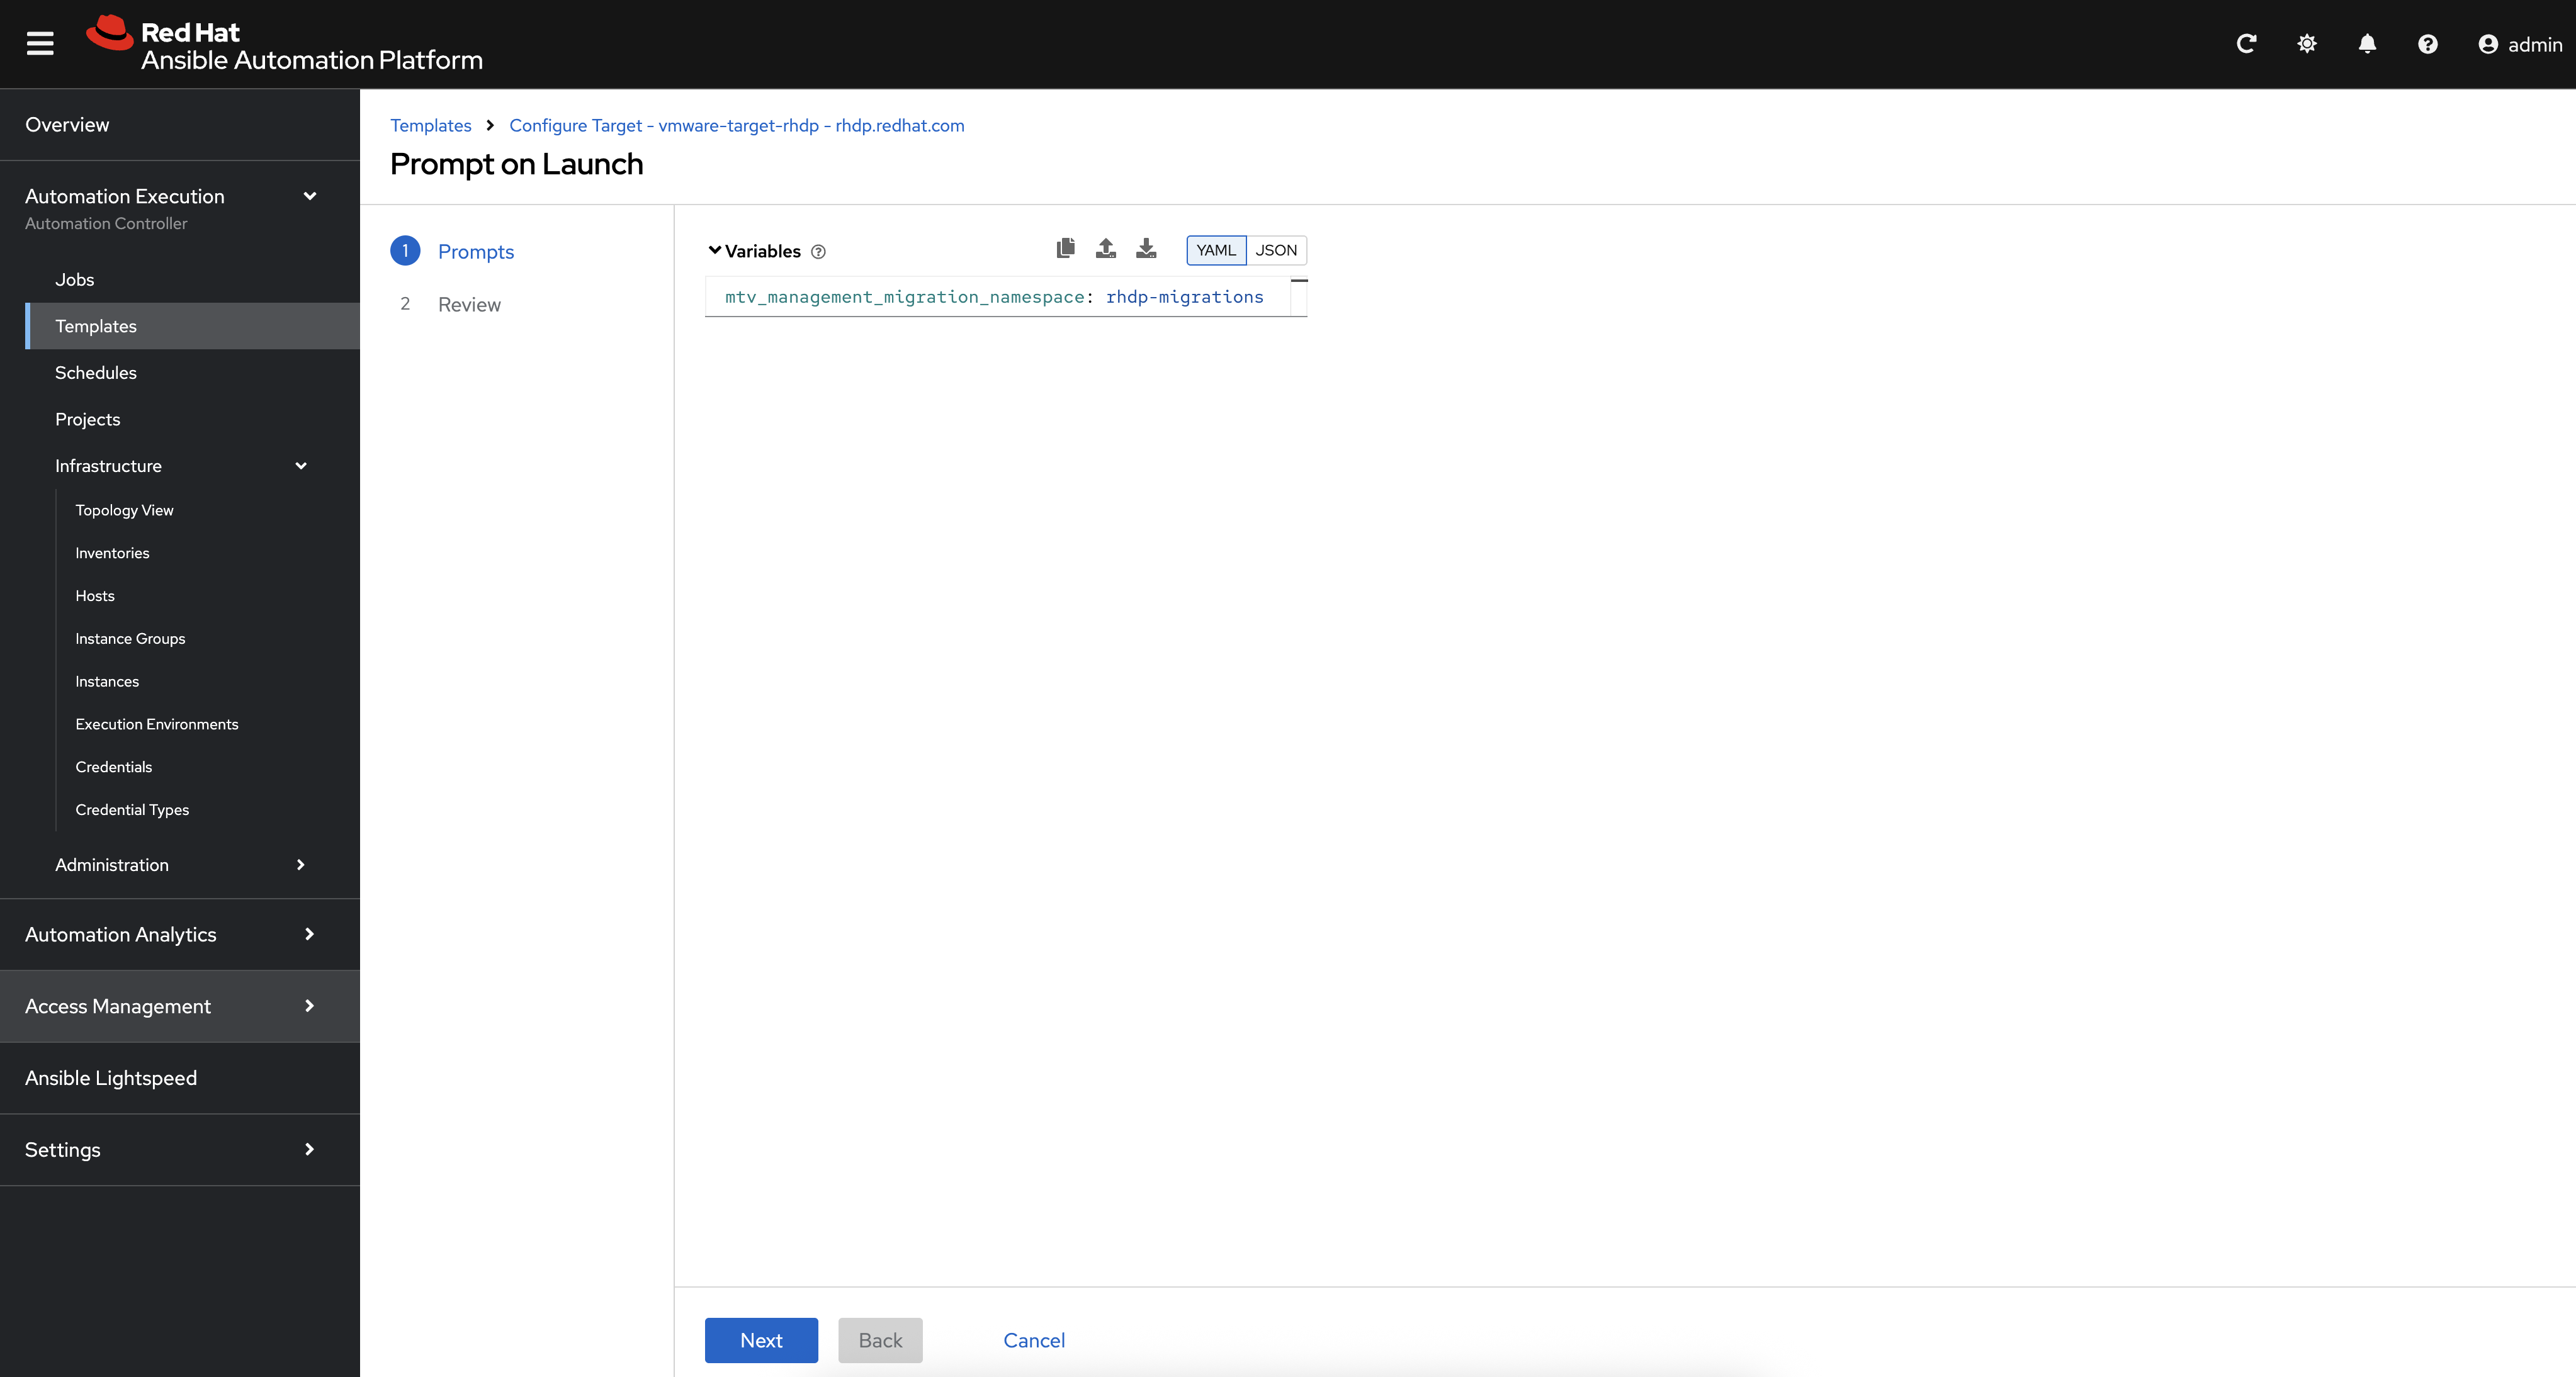
Click Next, review the configuration displayed, and then click Finish to launch the automation.
View NetworkMaps and StorageMaps
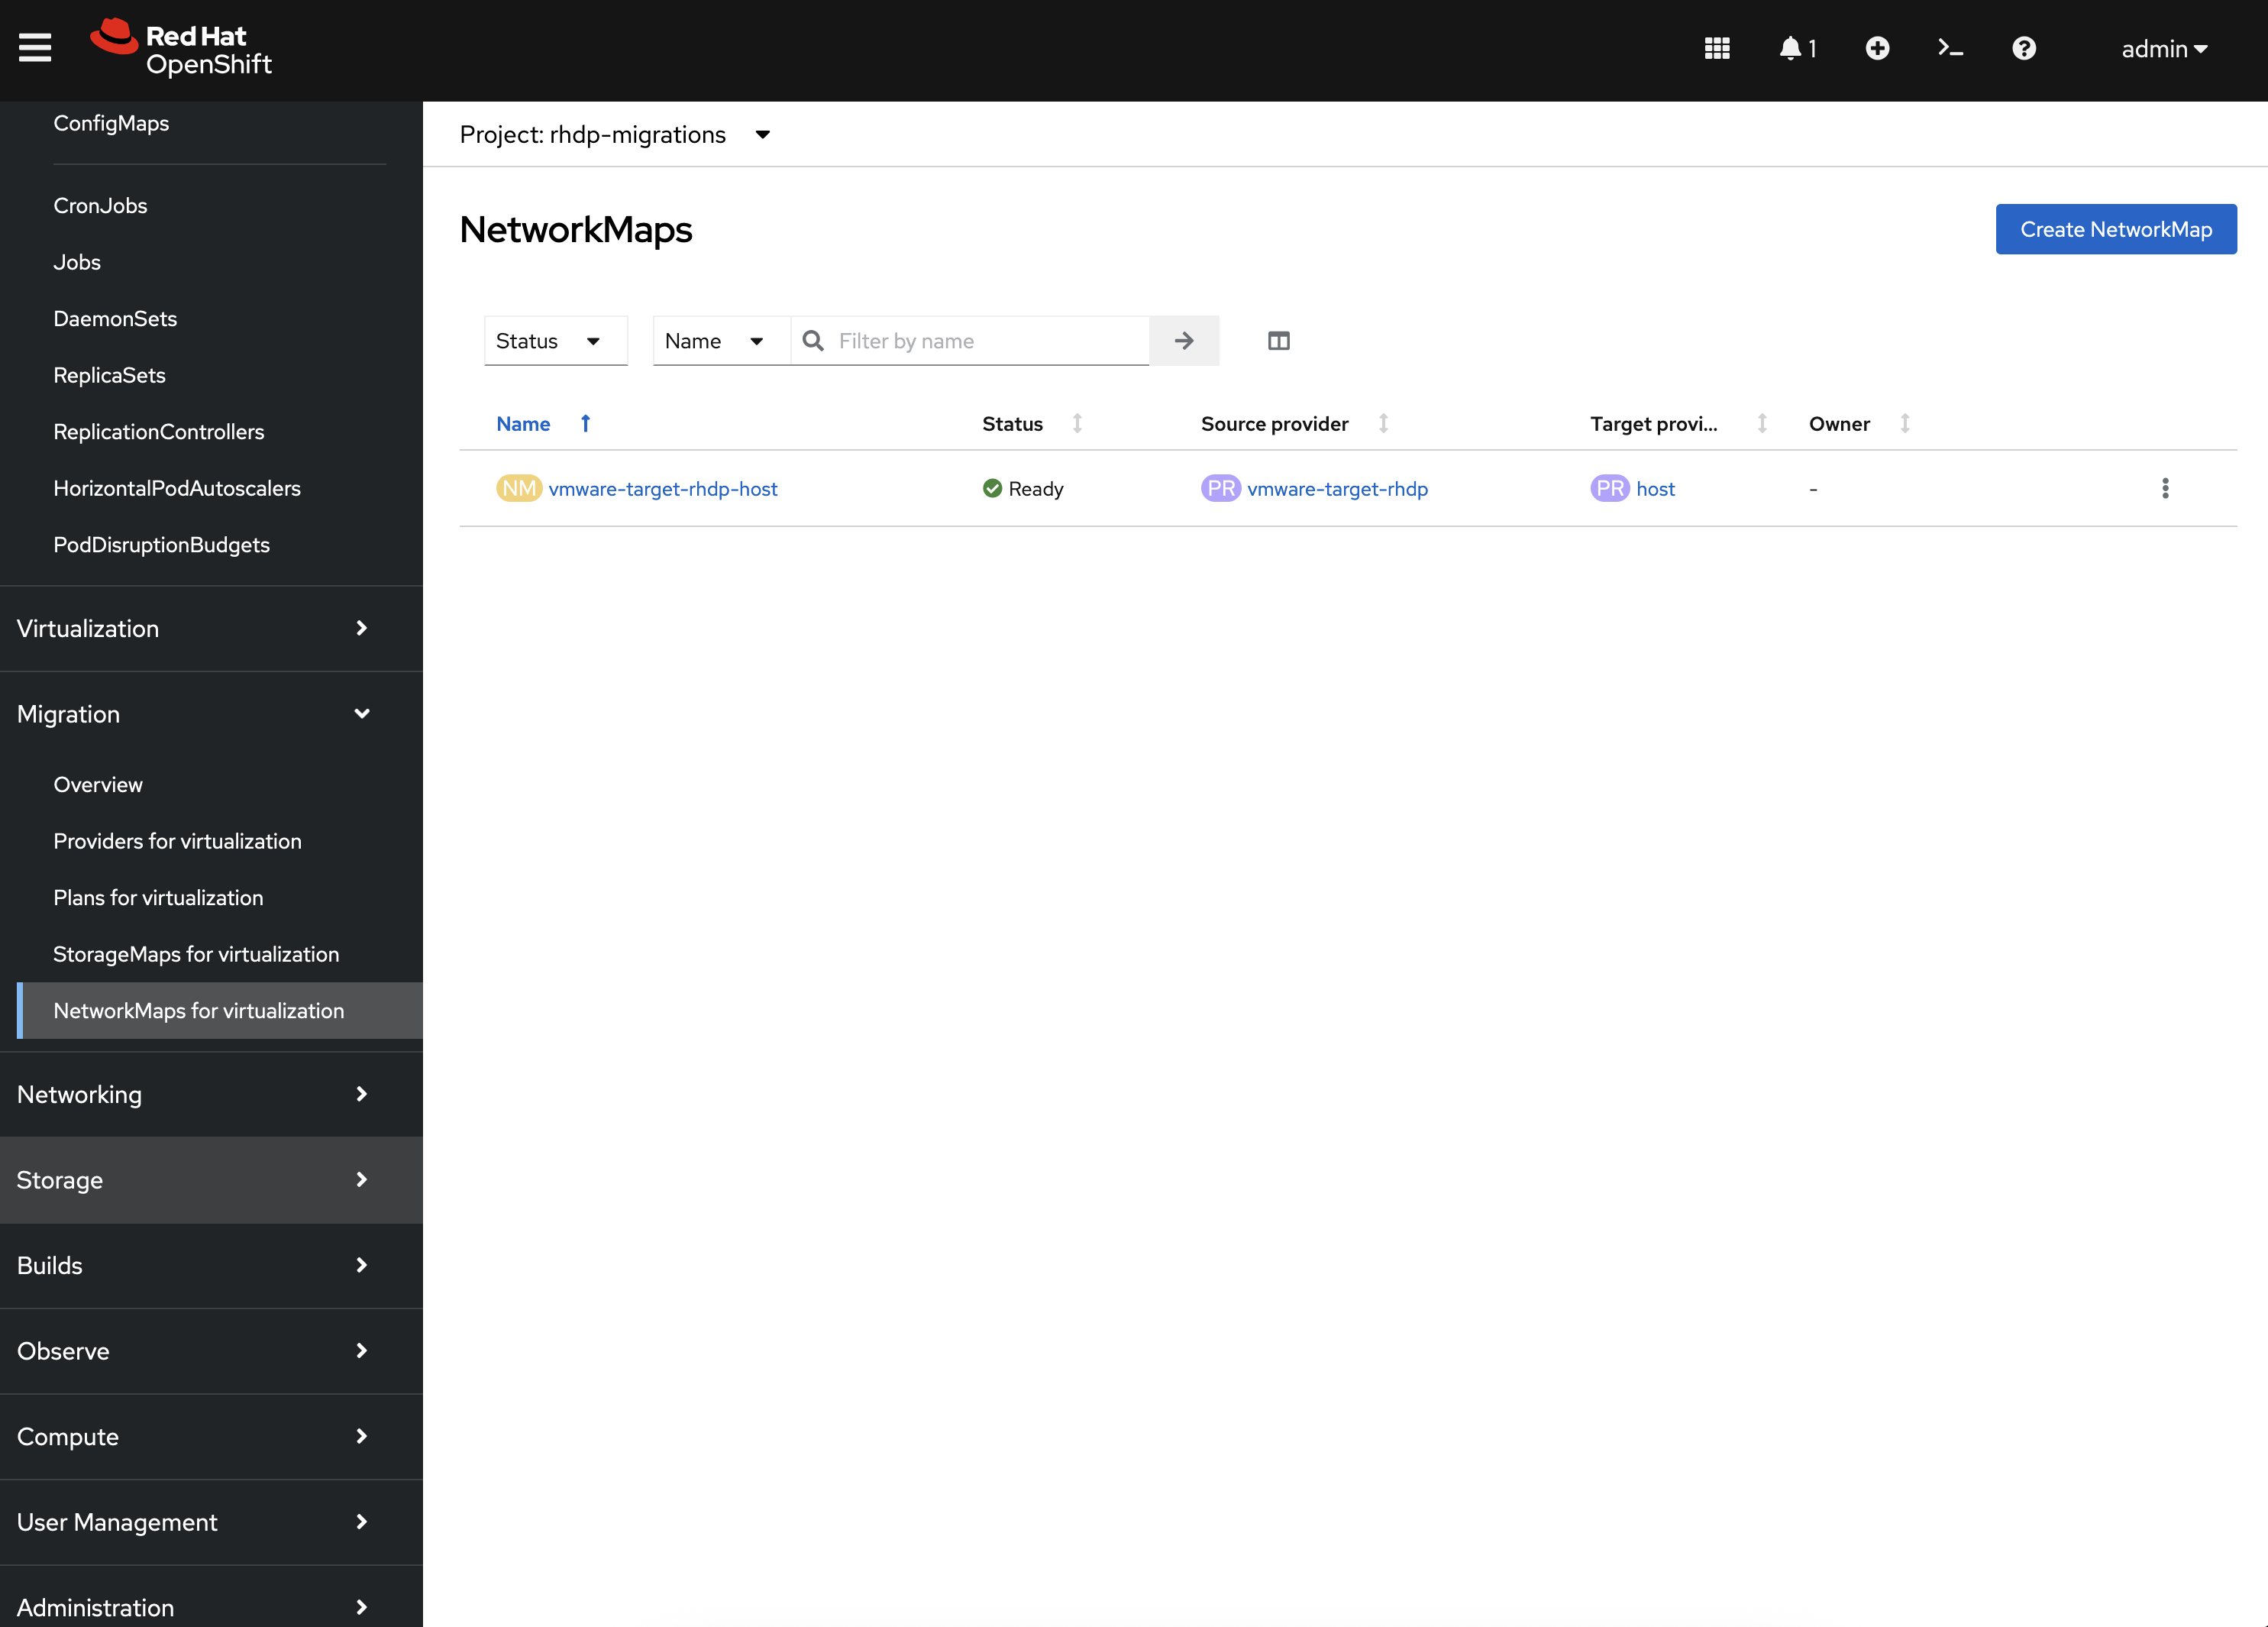
Once the workflow completes successfully, verify that the NetworkMaps and StorageMaps called vmware-target-rhdp-host were created in the rhdp-migrations namespace and are in a Ready status with a green checkmark by navigating once again to the OpenShift Web Console, expanding the Migration section on the left hand navigation bar, and select either StorageMaps for virtualization or NetworkMaps for virtualization. Ensure that the rhdp-migrations Project is selected from the dropdown.
Using the Ansible for OpenShift Virtualization to Migrate Virtual Machines
With all of the required resources available to support the migration of Virtual Machines into the rhdp-migrations namespaces, the Ansible for OpenShift Virtualization Migration can now be used to automate the migration of Virtual Machines.
The migration process using the OpenShift Toolkit for Virtualization can be complex if there is a need to migrate a large amount of Virtual Machines — especially when there are a large number of Virtual Machines to Migrate. To simply this process, a Job Template within Ansible Automation Platform is available to perform these activities.
Launch Migration Template
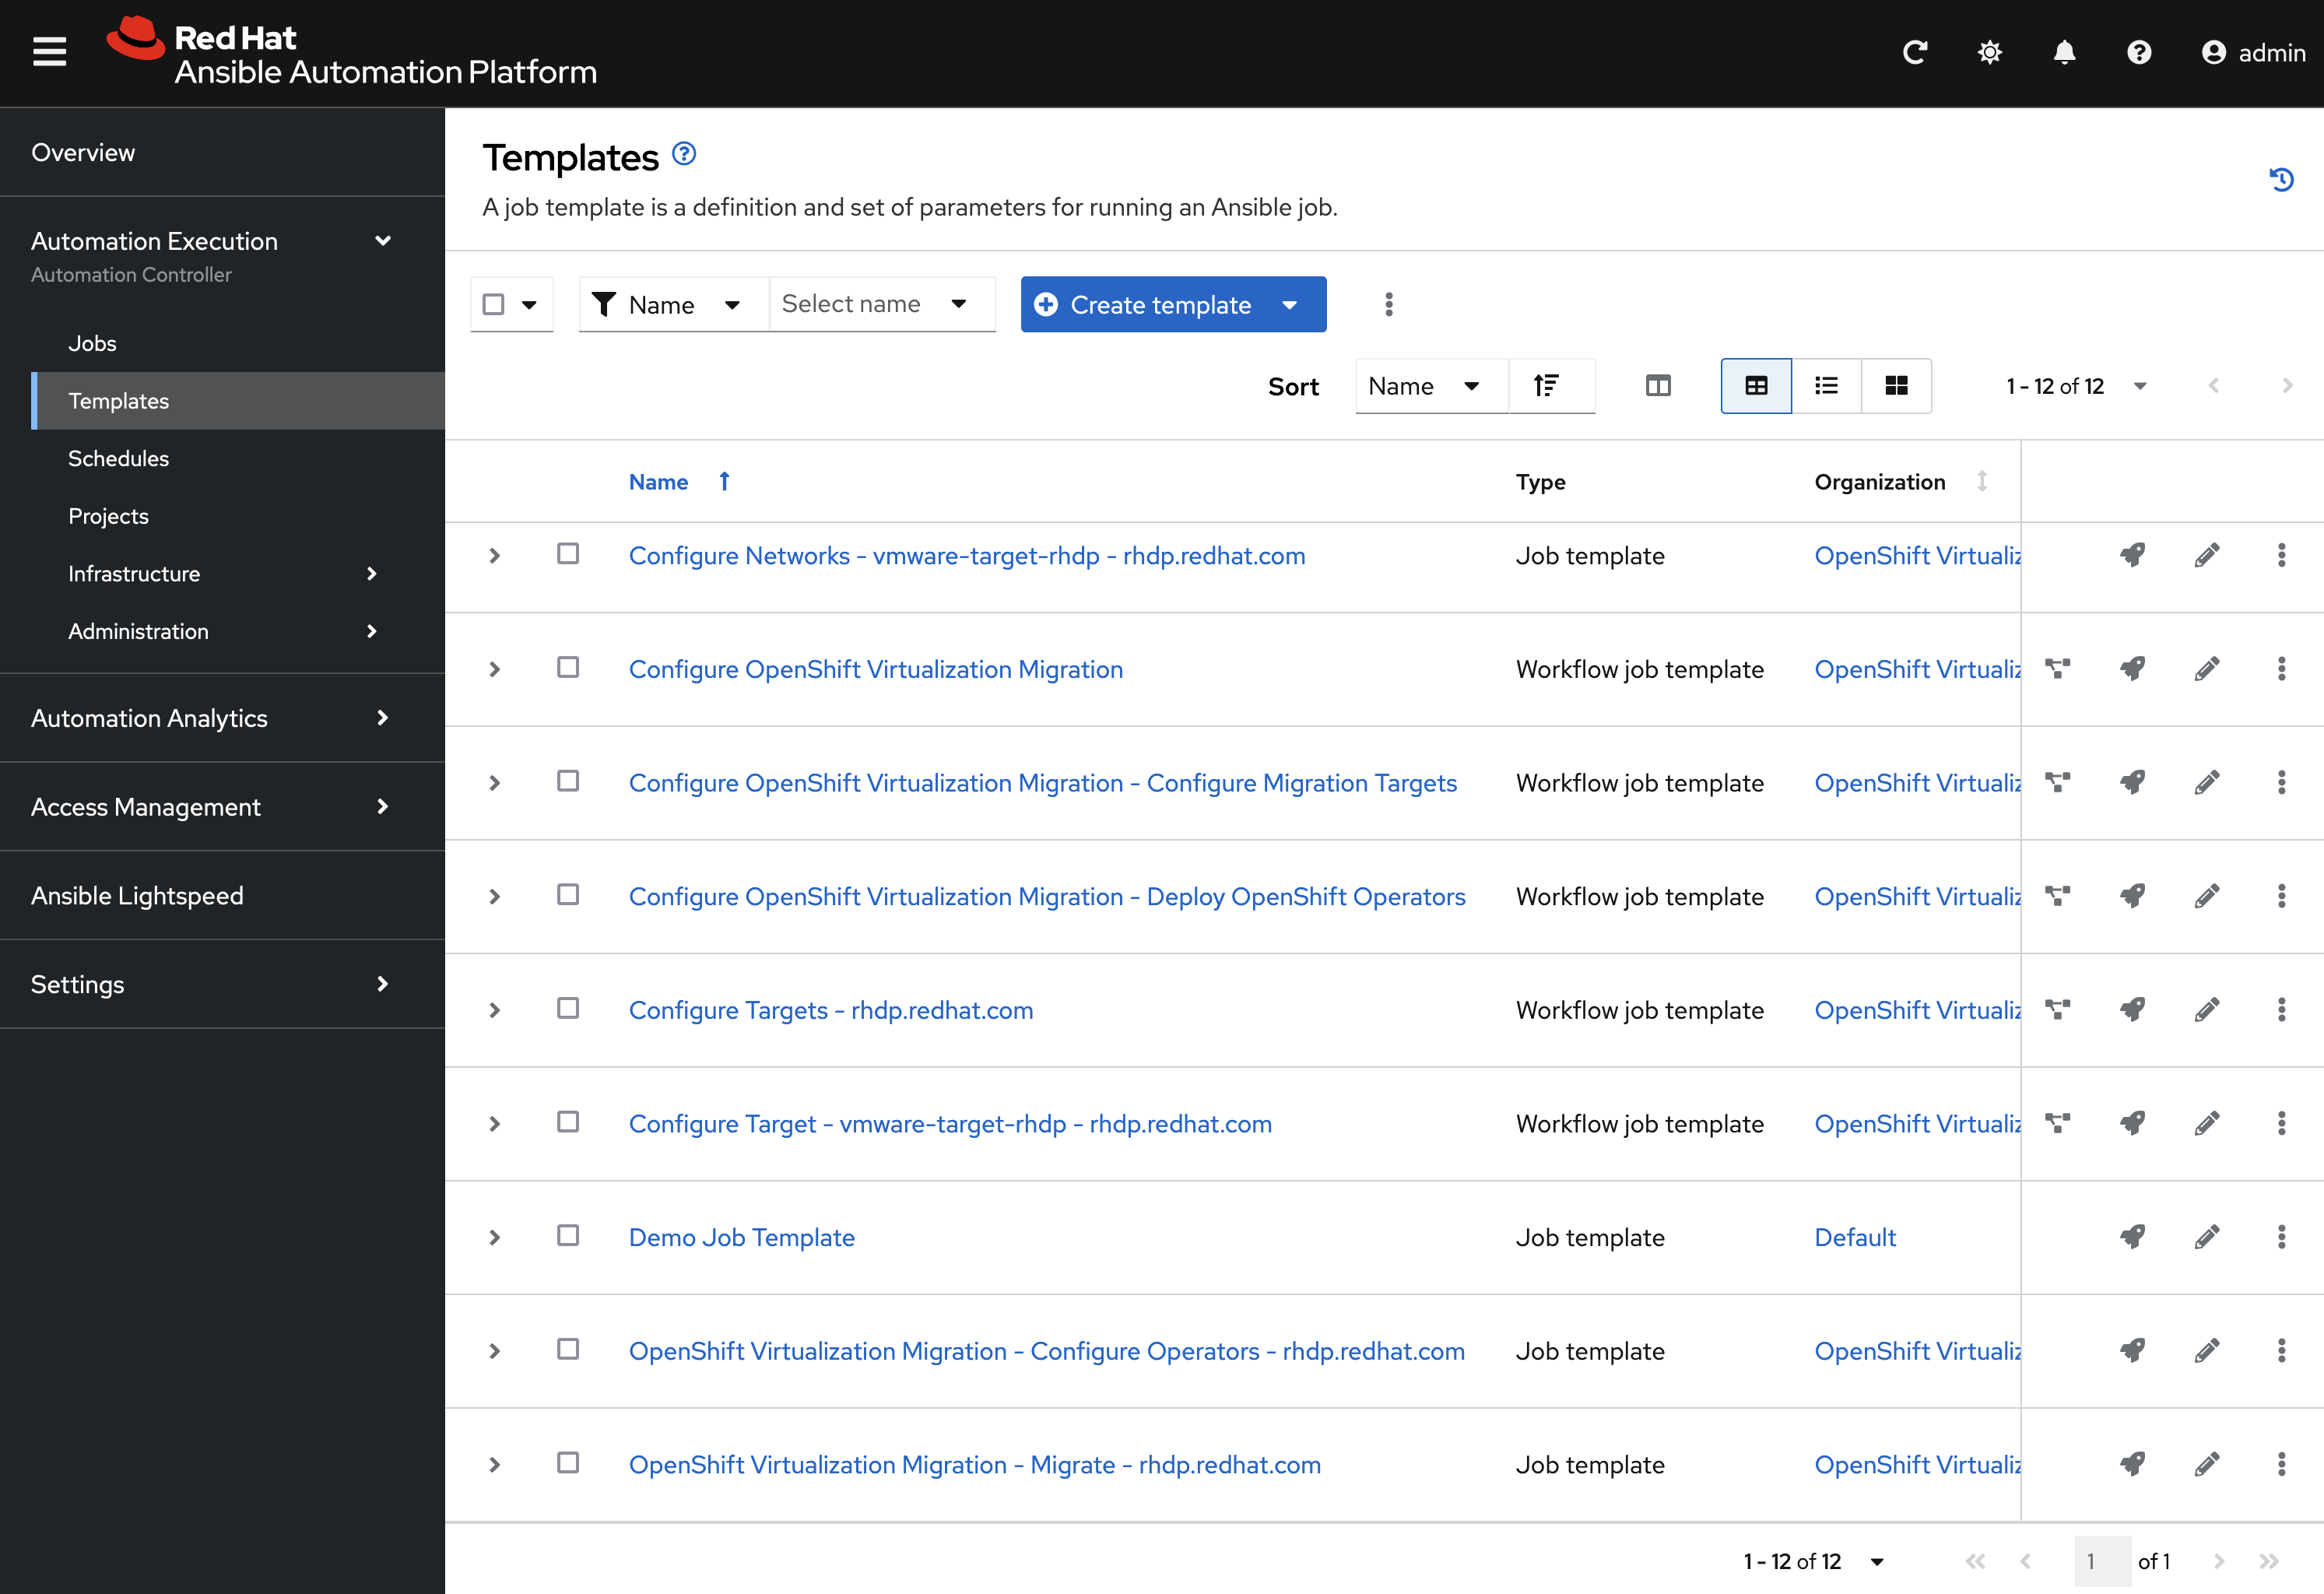
Navigate to Ansible Automation Platform and the Templates page within the Automation Execution section of the left hand navigation bar and locate the Job Template called OpenShift Virtualization Migration - Migrate - rhdp.redhat.com which can be used to perform the migration of Virtual Machines.
|
The OpenShift Virtualization Migration - Migrate - rhdp.redhat.com Job Template may not be visible in the list of Templates as only 10 Templates are displayed by default. Increase the number of Templates displayed on the page or use the page navigation button to change the selected page being displayed. |
The underlying automation leverages a variable called mtv_migrate_migration_request to govern how the Migration Toolkit for Virtualization and the Plan and optionally Migration resources are constructed. The full set options and their meaning can be found here.
Click the Launch template button where you will be presented with a form to specify the mtv_migrate_migration_request variable to define how the migration should be processed.
To migrate the Virtual Machine called haproxy-user1 from VMware to the rhdp-migrations namespace, enter the following into the Variables textbox:
mtv_migrate_migration_request:
  mtv_namespace: rhdp-migrations
  source: vmware-target-rhdp
  source_namespace: openshift-mtv
  destination: host
  destination_namespace: openshift-mtv
  target_namespace: rhdp-migrations
  network_map: vmware-target-rhdp-host
  network_map_namespace: rhdp-migrations
  storage_map: vmware-target-rhdp-host
  storage_map_namespace: rhdp-migrations
  start_migration: true
  verify_plans_ready: true
  plan_name: haproxy-user1
  vms:
    - name: haproxy-user1
Let’s review some of the properties that were specified within the mtv_migrate_migration_request variable.
First, mtv_namespace specifies the Namespace where the Plan and Migration resources will be created.
The source and source_namespace along with destination and destination_namespace specifies the name and location the MTV Source and Destination Providers.
The target_namespace specifies the Namespace where the Virtual Machine(s) will be created.
The network_map and network_map_namespace along with the storage_map and storage_map_namespace specifies the name of the StorageMap and NetworkMap resources to associate with the Plan.
By default, only the Plan is created. By setting start_migration to true, a Migration resource is also created to start the migration of the Virtual Machine(s)`.
Setting verify_plans_ready to true will also track the state of the Plan to ensure that it supports the Migration based on the parameters provided.
The plan_name influences the name of the Plan custom resource that is created. If the property is not defined, the Plan that is ultimately created will take the name in the form <source_name>-<target_name>-yyyyMMdd-HHmm.
Finally, the list of Virtual Machines that are to be migrated are provided. Additional options, such as providing the VMware MOID (Managed Object ID), excluding Virtual Machines as well as overriding the generated Virtual Machine configurations, can be provided.
In addition, while not shown in this specific migration, entire VMware folders can be migrated by using the folders property. However, it is important that multiple Plan resources be created in order to avoid overwhelming the resources both within OpenShift and in the source VMware environment. This can be achieved by setting the split_plans property to true along with customizing the vms_per_plan field (by default, this value is 10).
Click Next to review the properties to apply for the the Job execution.
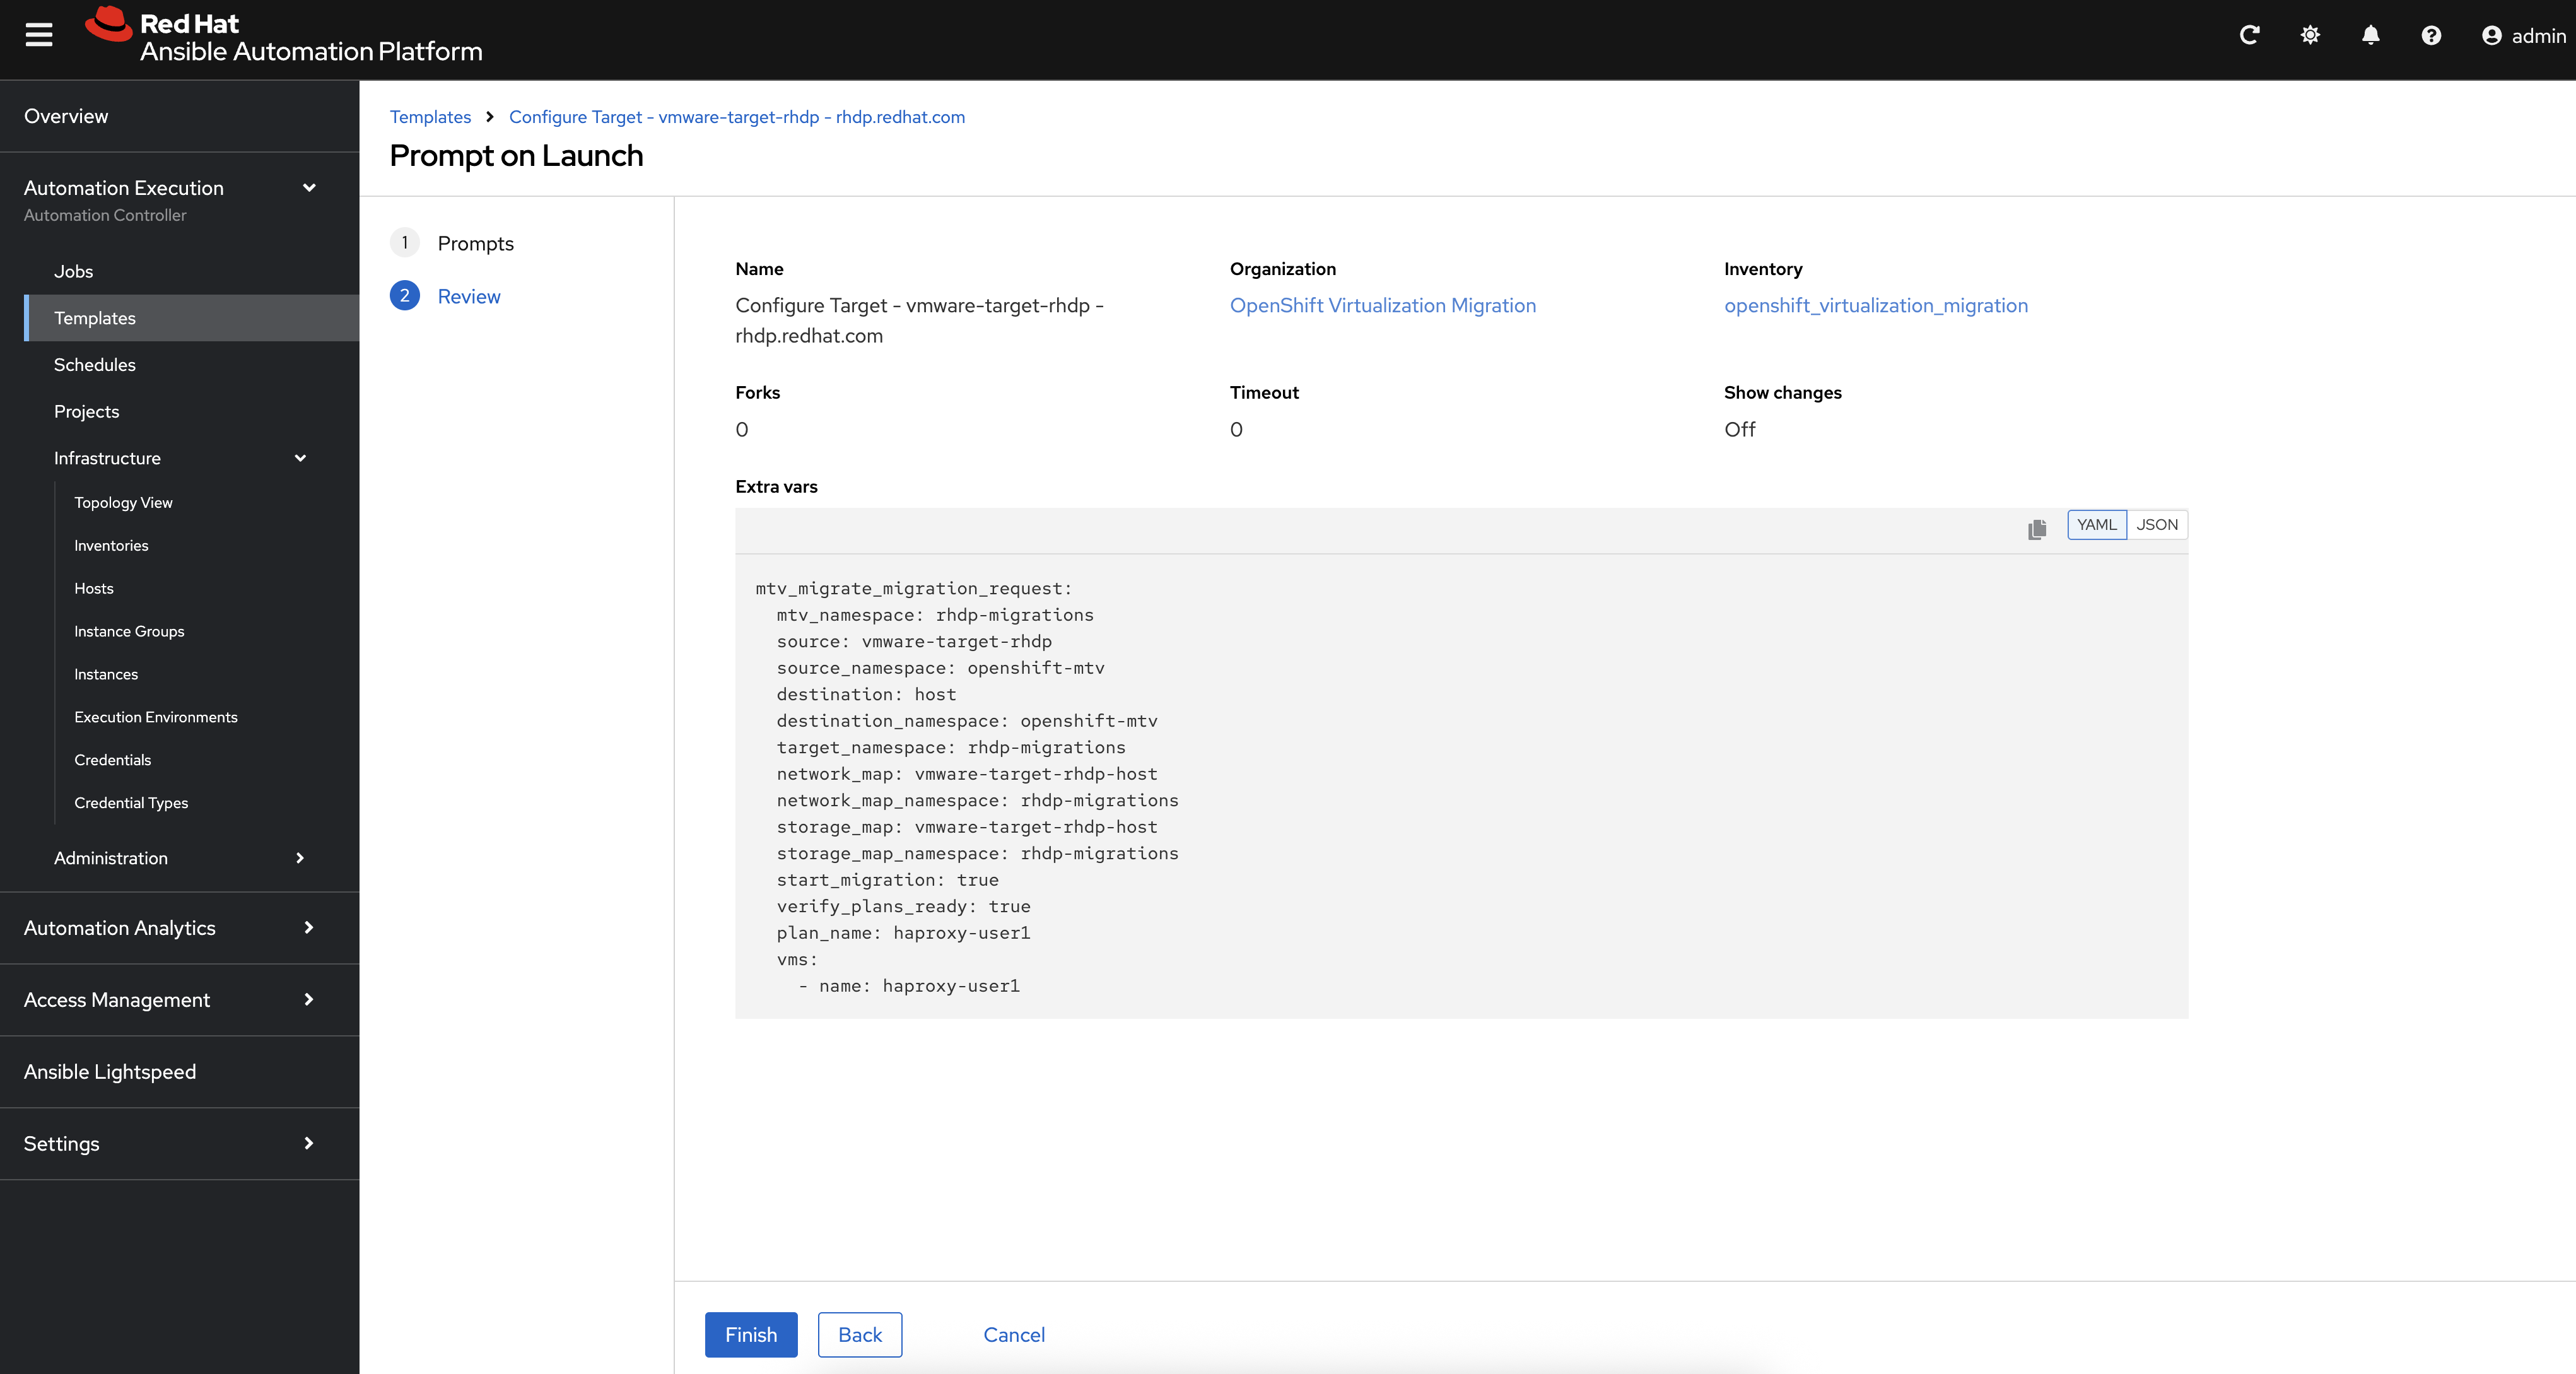
Select Finish to start the automation.
The Automation will first verify the input provided, determine the Virtual Machines to Migrate and then create the Plan in the rhdp-providers Namespace. It will then wait and verify that the Plan is ready and then start the migration by creating a Migration custom resource.
While not specified in this case, support is also available to track the status of the migration by setting verify_migrations_complete to true.
Monitor the output of the Job as it executes. It will take a few minutes for the Plan to become ready and start.
Explore the Migration Plan and Migrated Virtual Machine
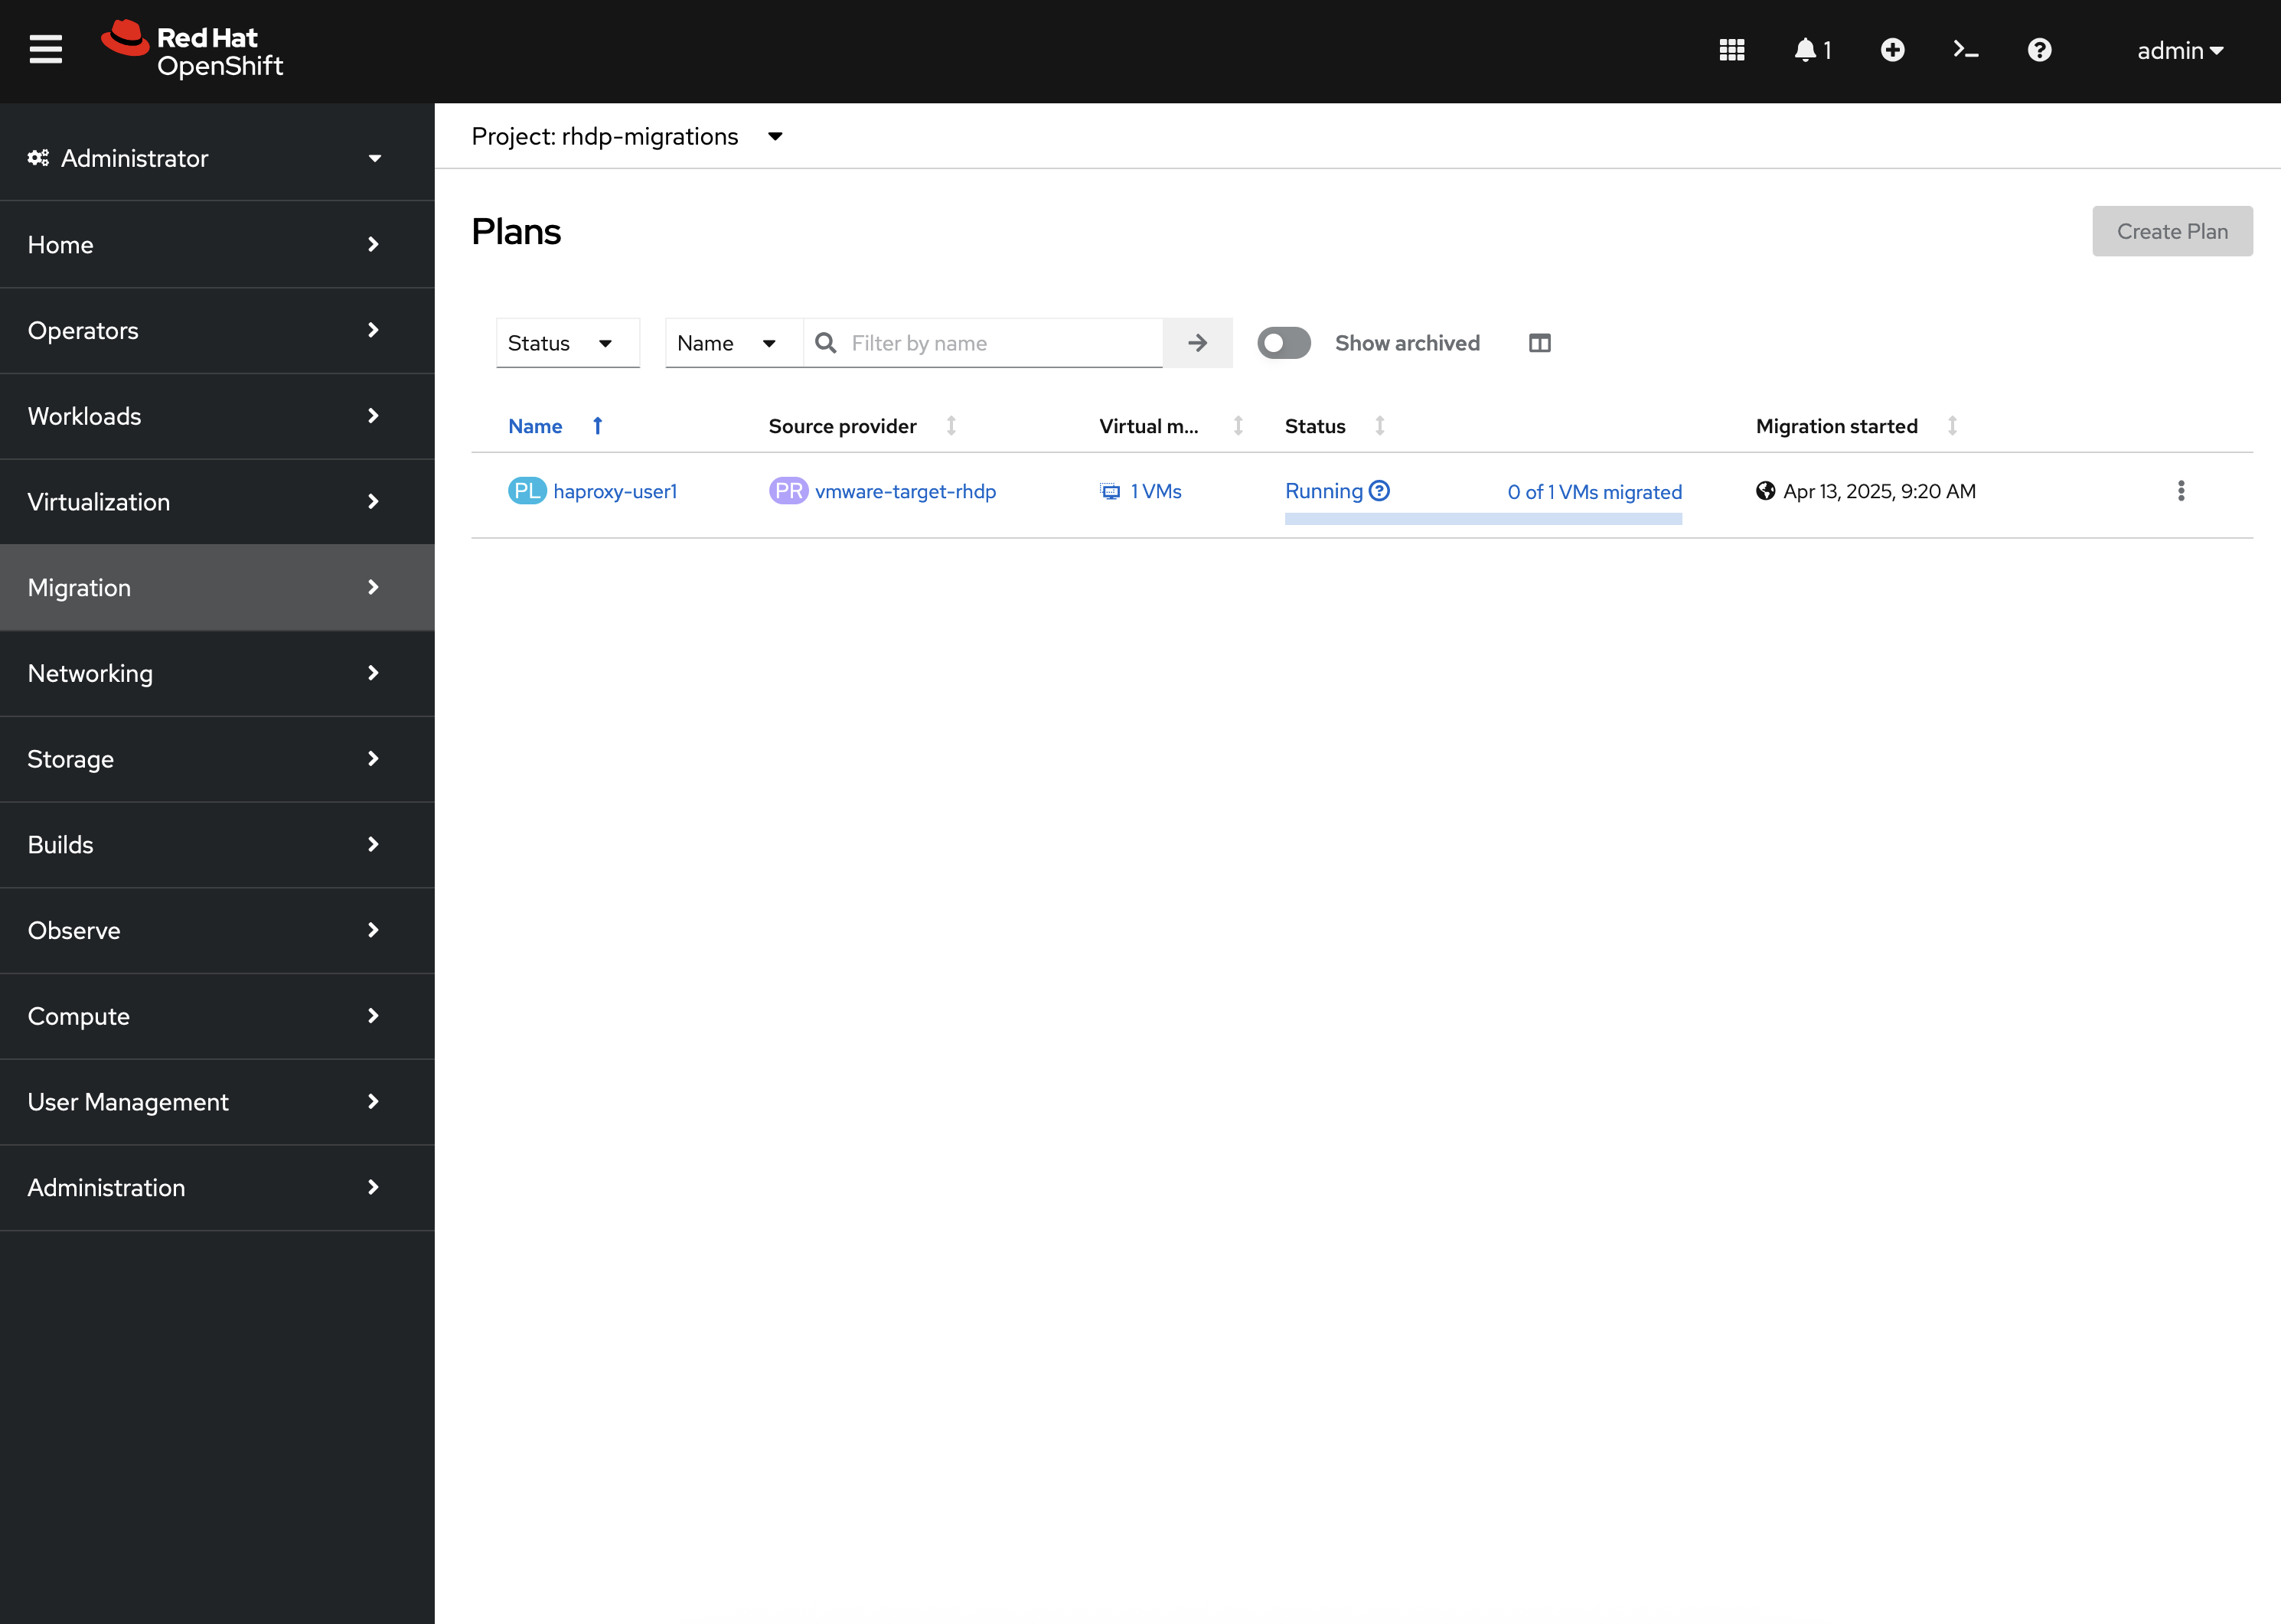
Once the Job completes successfully, navigate back to the OpenShift Console and select Plans for virtualization underneath the Migration section of the left hand navigation bar. A plan called haproxy-user1 will be present in the rhdp-migrations Namespace as shown below.
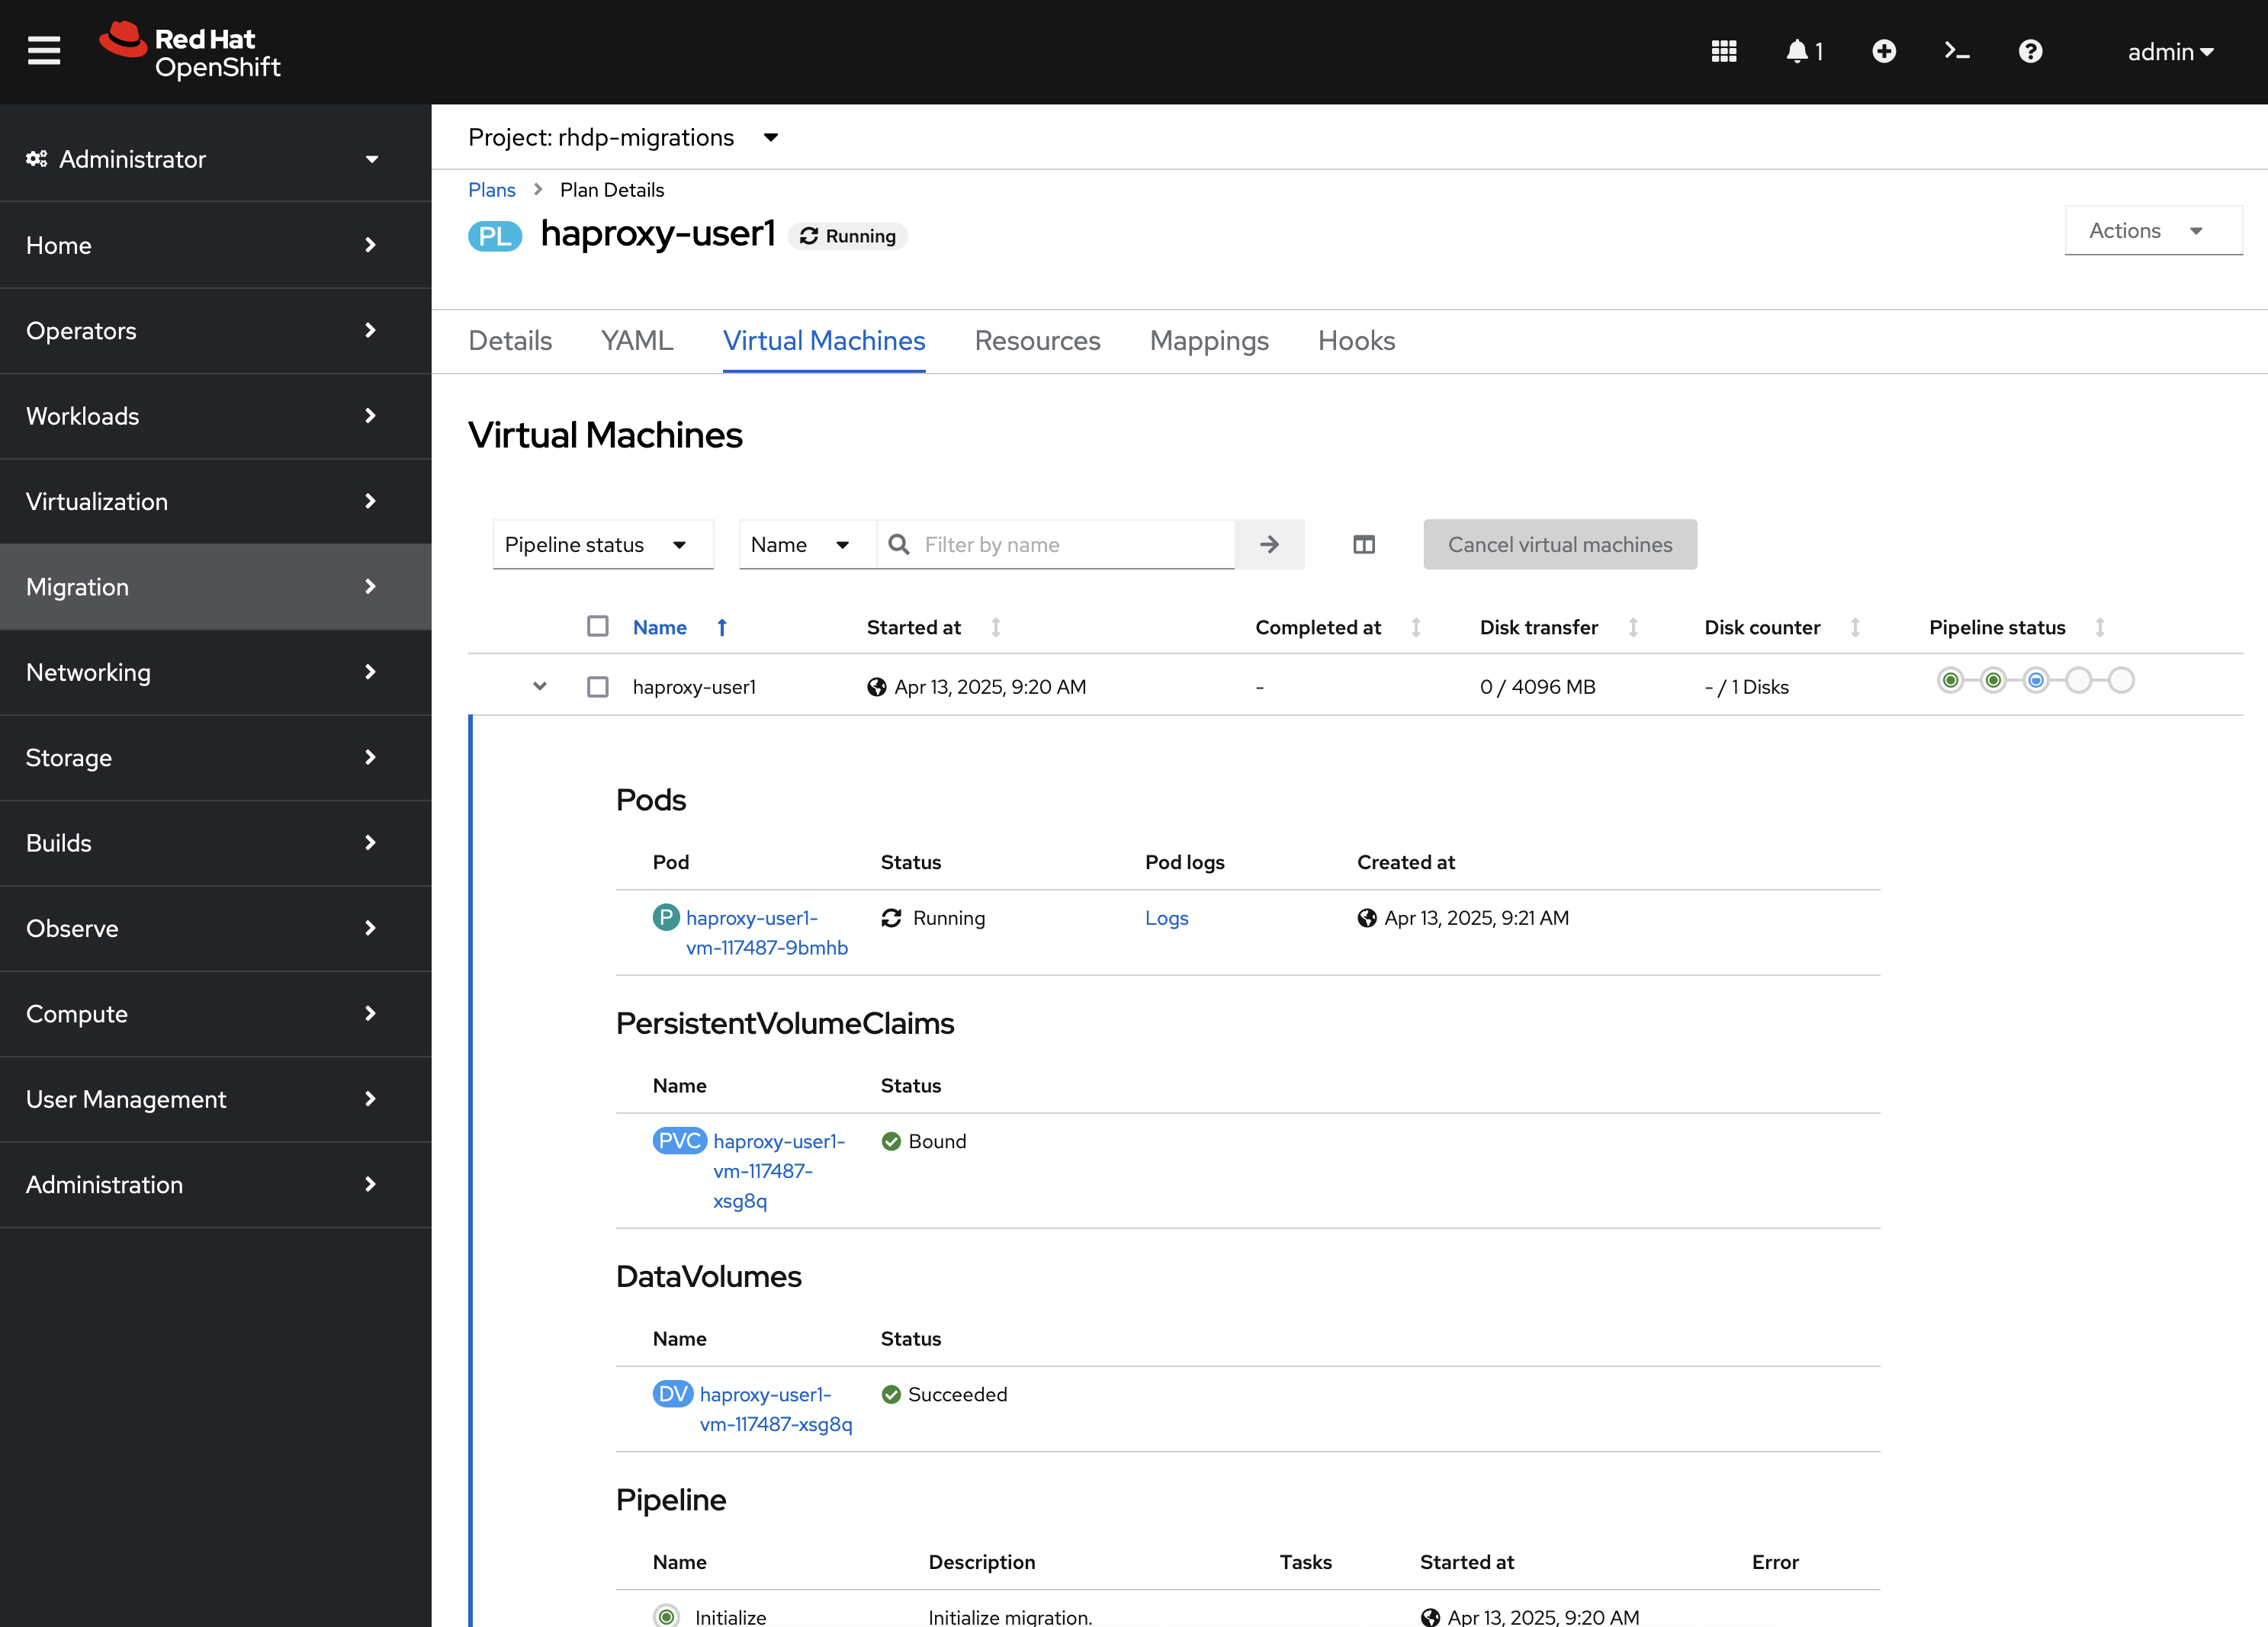
Select the haproxy-user1 Plan where you can see the current status. Select the Virtual Machines tab and expand the haproxy-user1 Virtual Machine to see the current state of the Migration.
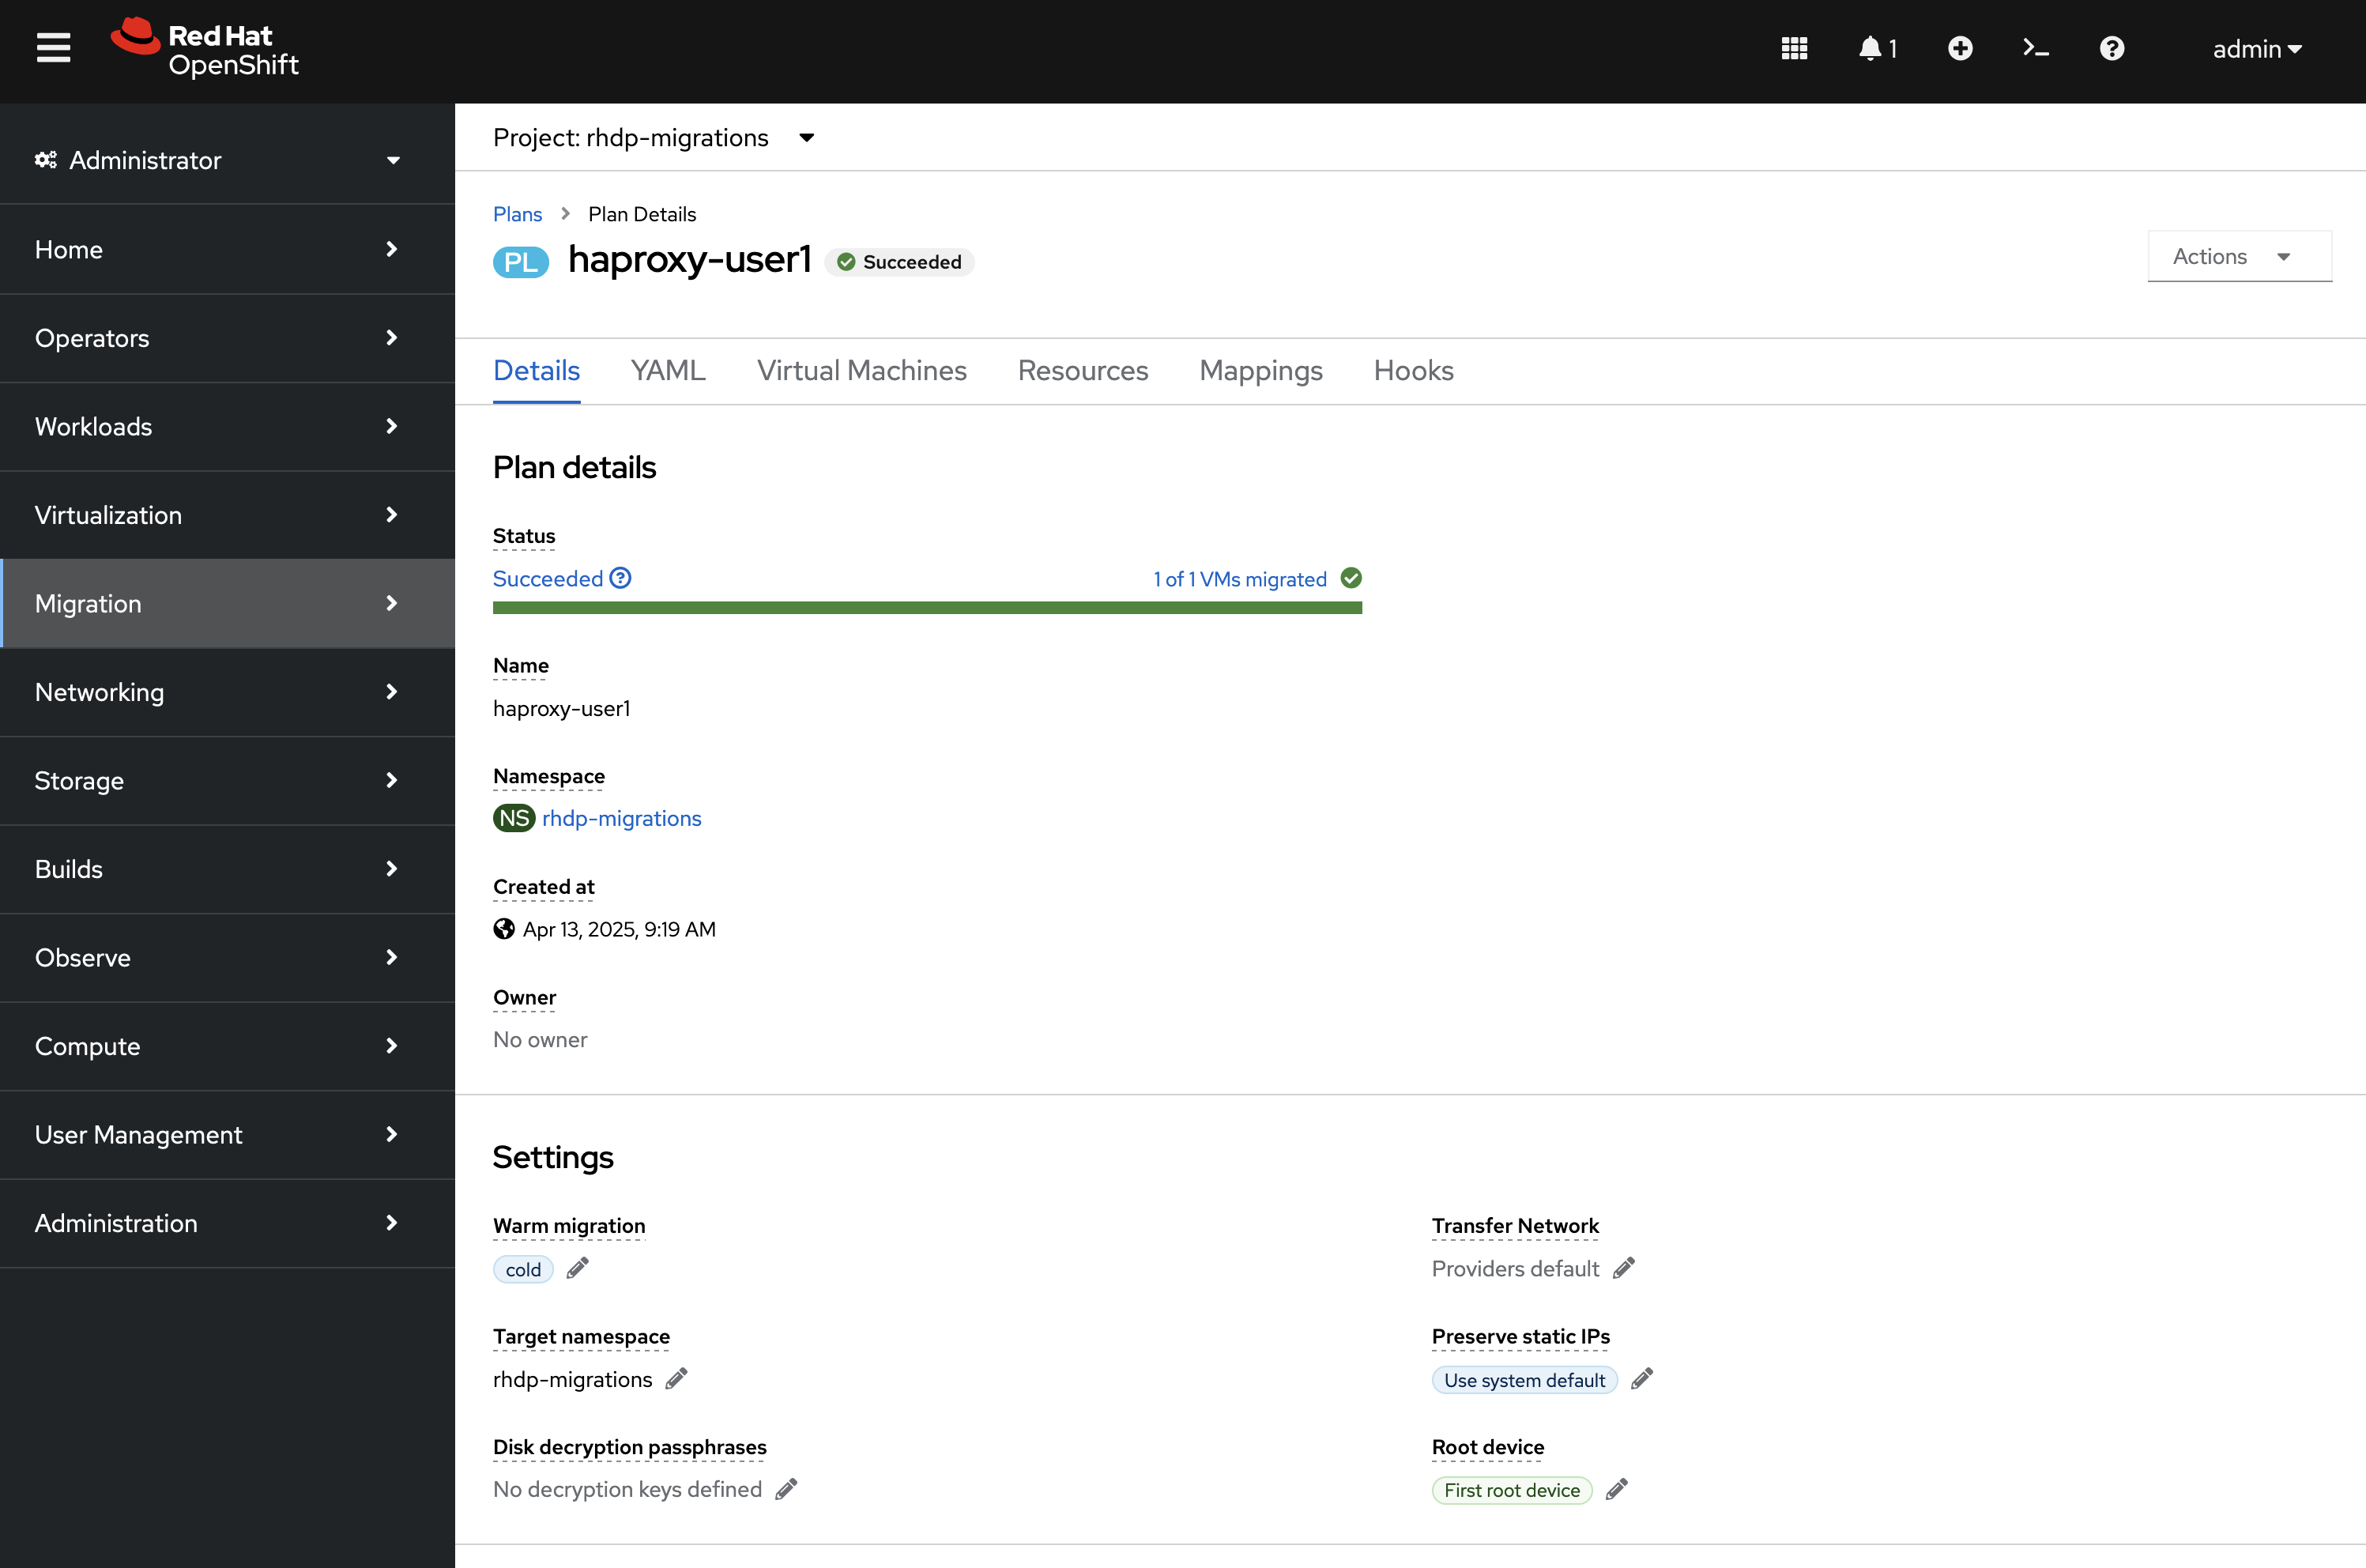
Continue to monitor the plan until the Migration completes successfully which is depicted similar to the following.
To view the Virtual Machine that was created in OpenShift as part of the Migration, on the haproxy-user1 Plan page, select Virtual Machines, expand haproxy-user1 and underneath Virtual machine, select the haproxy-user1 Virtual Machine.
By default, the Virtual Machine is off. To start the Virtual Machine click on the Actions dropdown at the top right corner of the page and click Start.
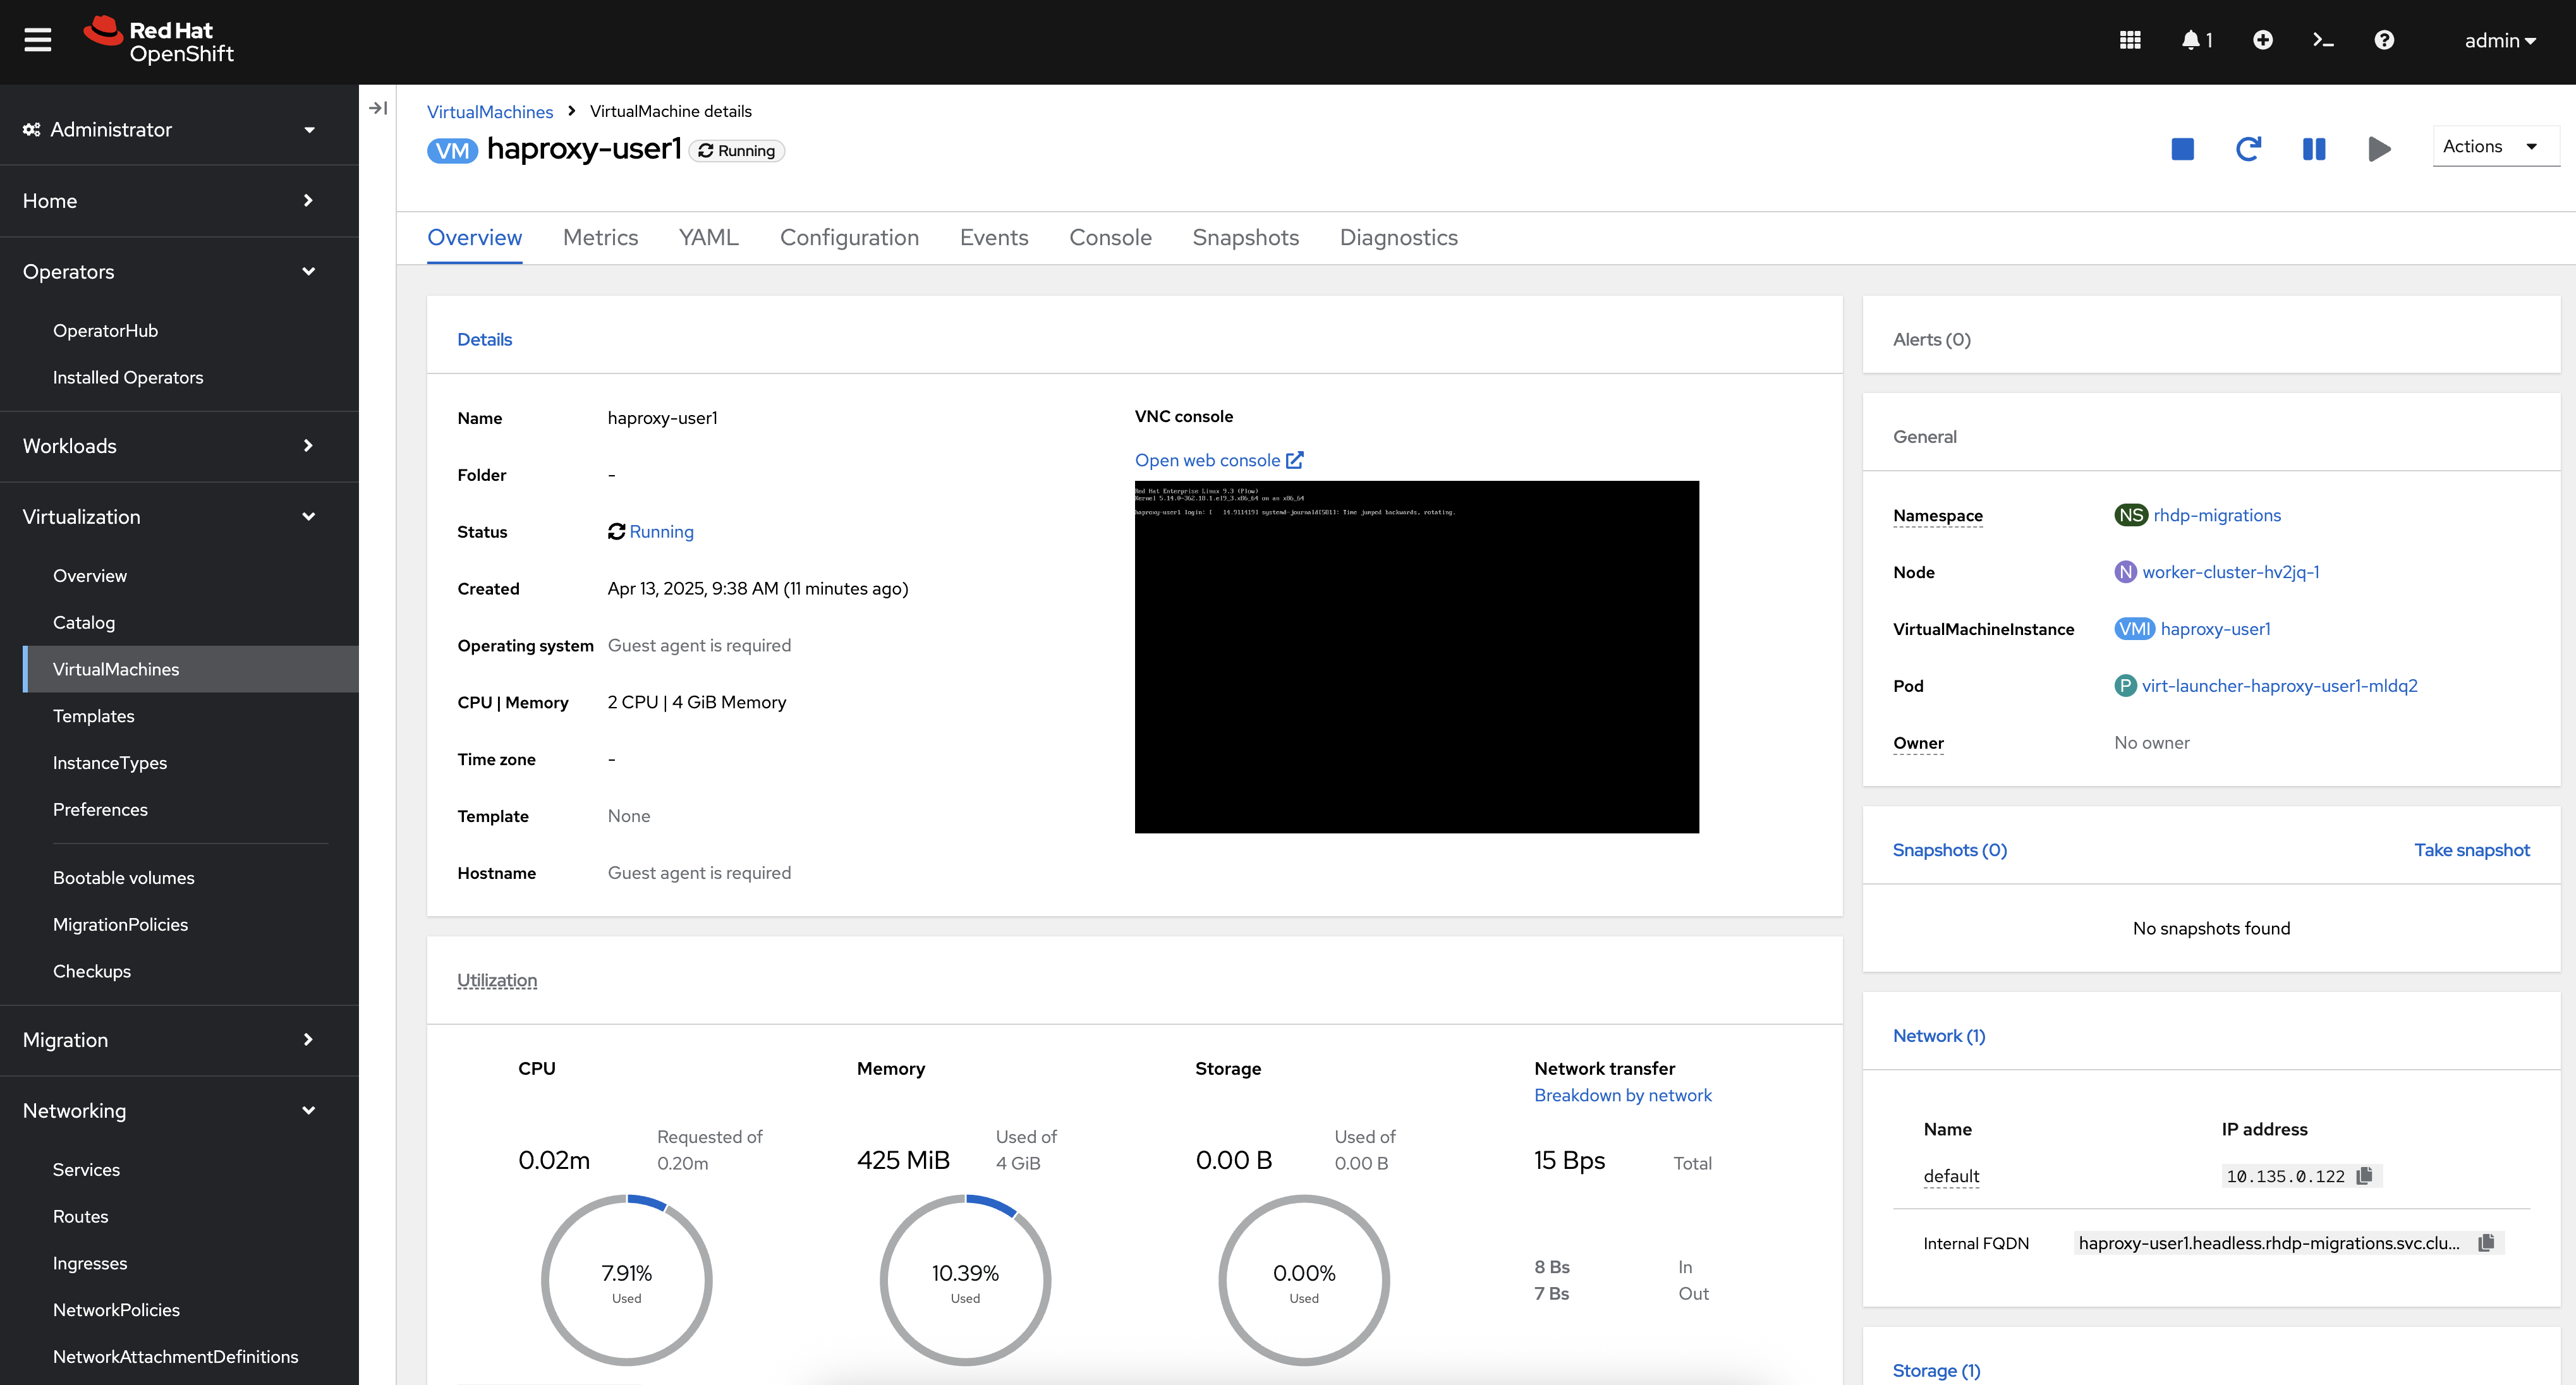
At this point the migration process was a success, and you can begin working with the Virtual Machine within OpenShift.